Introduction
Photographing jewelry can be a challenging task, but mastering the art of how to photograph jewelry can significantly boost your sales. High-quality images are essential for attracting potential customers and showcasing the beauty and details of your products. In this article, we will explore various tricks and tips that can help you capture stunning jewelry photos. Whether you’re a beginner or an experienced photographer, these techniques will elevate your skills and make your jewelry stand out in the competitive market.
Understanding the Basics of Jewelry Photography
Before diving into specific techniques, it’s important to understand the basics of jewelry photography. Unlike other types of product photography, jewelry requires special attention to detail. The small size and reflective surfaces of jewelry pieces make them particularly challenging to photograph. To achieve the best results, you need to consider factors such as lighting, background, and camera settings. Proper understanding of these elements will help you create high-quality images that showcase the true beauty of your jewelry.
Lighting
Lighting is one of the most critical aspects of how to photograph jewelry. The right lighting can bring out the sparkle and shine of your jewelry, while poor lighting can make even the most beautiful piece look dull. Here are some detailed tips to help you achieve the best lighting for your jewelry photography:
Natural Light:
Utilize Natural Light: Whenever possible, use natural light as it provides a soft, diffused light that highlights the details of the jewelry. Place your setup near a large window or in a well-lit room.
Time of Day: The time of day can also affect the quality of natural light. Early morning or late afternoon light is often softer and more flattering compared to the harsh midday sun.
Diffuse the Light: If the natural light is too strong, you can use a sheer curtain or a diffuser to soften it. This will help reduce harsh shadows and reflections.
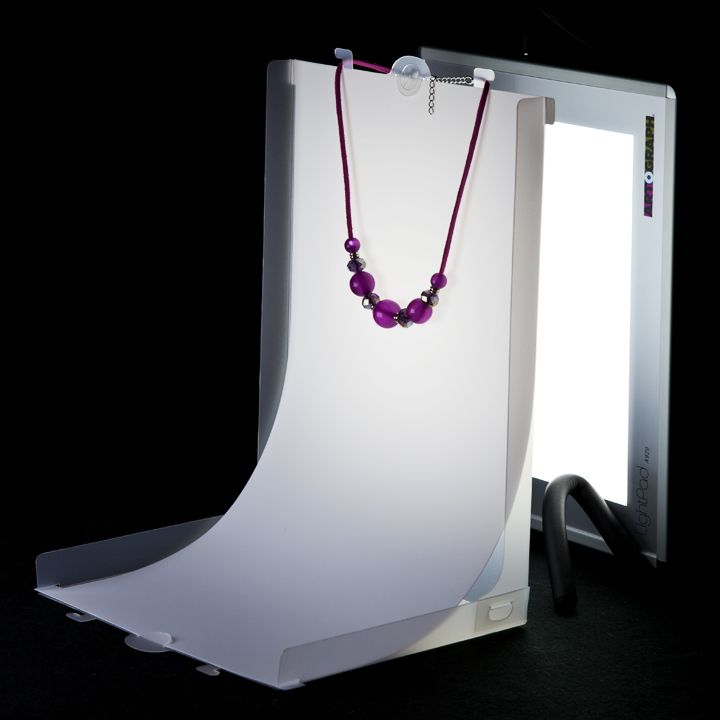
Artificial Light:
Soft boxes and Reflectors: If natural light is not available, use a combination of soft boxes and reflectors to create a similar effect. Soft boxes diffuse the light, making it softer and more even, while reflectors bounce light back onto the jewelry, filling in shadows.
Avoid Harsh Light Sources: Direct, harsh light sources like bare bulbs or unmodified flash can create unwanted reflections and shadows. Instead, opt for diffused light sources.
Experiment with Different Setups: Try different positions and angles for your lights. For example, placing a soft box at a 45-degree angle to the jewelry can create a nice, even light. Use multiple lights if necessary to ensure all parts of the jewelry are well-illuminated.
Reflective Surfaces:
Use Reflectors: Reflectors can be used to bounce light back onto the jewelry, reducing shadows and adding dimension. White and silver reflectors are commonly used, but gold and black reflectors can also add unique effects.
Manage Reflections: Be mindful of reflective surfaces in your setup. Jewelry can pick up reflections from nearby objects, so keep the area around your setup clean and clutter-free.
Background Considerations: Choose a background that complements the jewelry without causing unwanted reflections. A simple, matte surface works well, but you can also experiment with different textures and colors.
Consistency:
Maintain Consistency: Once you find a lighting setup that works well, try to maintain consistency across all your photos. This will help create a cohesive look and make your product listings more professional.
Document Your Setup: Take notes or photos of your lighting setup so you can easily replicate it for future shoots. This will save you time and ensure that your images have a consistent quality.
Adjust as Needed: Even with a consistent setup, you may need to make small adjustments for different pieces of jewelry. Pay attention to the specific needs of each piece and make changes accordingly.
Camera and Settings
While a high-end camera can certainly help, you don’t necessarily need the most expensive equipment to take great jewelry photos. A decent DSLR or mirrorless camera with a macro lens is sufficient for capturing the fine details of jewelry. When it comes to camera settings, use a low ISO (100-200) to minimize noise, a narrow aperture (f/8 to f/16) to ensure a deep depth of field, and a slower shutter speed to allow more light. Manual focus is also recommended, as it gives you more control over the sharpness of your images. By using the right camera and settings, you can capture crisp, detailed photos that highlight the intricate design of your jewelry.
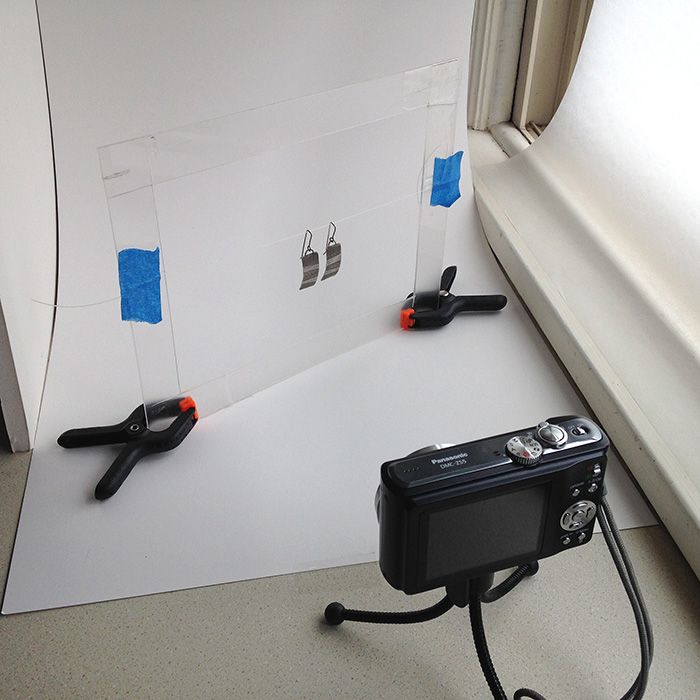
Setting Up Your Photography Space
How to photograph jewelry? A well-organized and properly set up photography space is crucial for successful jewelry photography. Start by choosing a clean, clutter-free area where you can control the lighting and background. A light box or a simple white backdrop can work wonders in creating a professional look. Additionally, invest in a good quality tripod to keep your camera steady and ensure consistent framing. By setting up a dedicated space, you can streamline your photography process and produce high-quality images consistently.
Background and Composition
The background and composition of your jewelry photos play a significant role in how they are perceived. A simple, uncluttered background allows the jewelry to be the focal point of the image. White or light-colored backgrounds are popular choices, as they provide a clean, professional look. However, you can also experiment with different colors and textures to add interest to your photos. When composing your shots, pay attention to the placement of the jewelry. Use the rule of thirds to create a balanced and visually appealing image. Additionally, consider the angle and perspective from which you are shooting. Different angles can highlight different features of the jewelry, so try multiple compositions to find the most flattering one.
Props and Styling
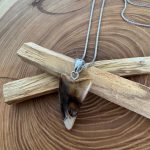
Using props and styling can add context and visual interest to your jewelry photos. Incorporating elements like fabric, flowers, or other decorative items can create a story and make your images more engaging. For example, placing a necklace on a mannequin or a ring on a hand model can help potential customers envision themselves wearing the jewelry. Be creative with your props, but ensure they do not overshadow the jewelry itself. The goal is to enhance the overall aesthetic without distracting from the main subject.
Post-Processing and Editing
Post-processing is an essential step in how to photograph jewelry. Even the best raw images can benefit from some editing to enhance their appearance. Use photo editing software like Adobe Lightroom or Photoshop to adjust the exposure, contrast, and color balance. You can also use tools like the healing brush to remove any dust or imperfections. Be careful not to over-edit, as you want the jewelry to look natural and authentic. Consistency is key, so apply the same editing style to all your images to create a cohesive look across your product listings. With the right editing techniques, you can transform your raw images into stunning, professional-quality photos.
Advanced Editing Techniques
For those who want to take their jewelry photography to the next level, advanced editing techniques can make a significant difference. Techniques like dodging and burning, which involve selectively brightening and darkening areas of the image, can add depth and dimension to your photos. Additionally, using layers and masks in Photoshop can help you make precise adjustments and retouches. These advanced techniques require more time and skill, but the results can be truly impressive. If you’re new to advanced editing, there are many online tutorials and courses available to help you get started.
Tips for Enhancing Your Jewelry Photos
To further enhance your jewelry photos, here are some additional tips:
- Use Props: Incorporating props like fabric, flowers, or other decorative elements can add context and visual interest to your photos.
- Experiment with Angles: Try different angles and perspectives to find the most flattering view of the jewelry. Side views, top-down shots, and close-ups can all be effective.
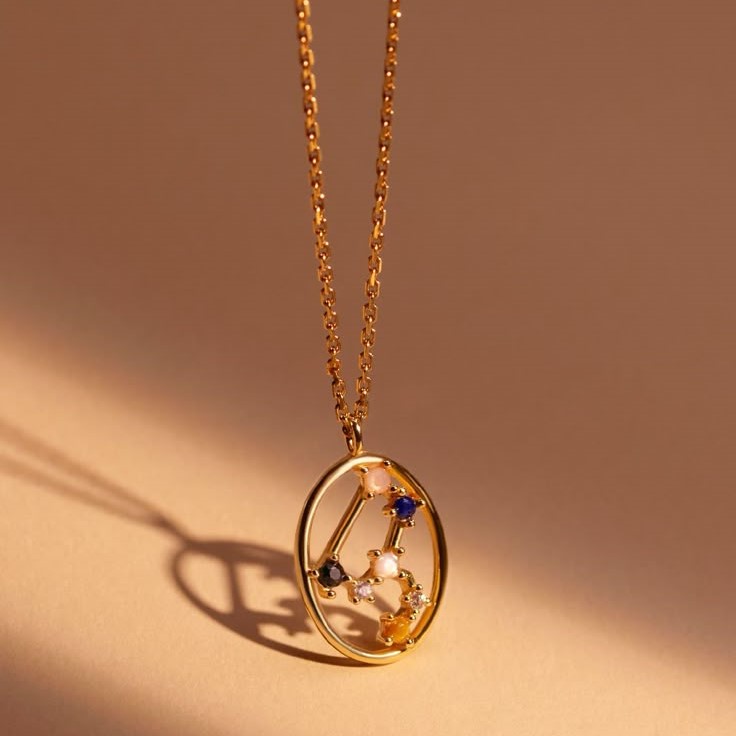
- Focus on Details: Highlight the unique features of each piece, such as gemstones, engravings, or intricate designs. Use macro shots to capture these details.
- Create a Story: Tell a story through your photos. Show the jewelry being worn or styled in different ways to help potential customers envision themselves using the product.
- Consistency is Key: Maintain a consistent style and quality across all your images. This helps build a strong brand identity and makes your listings more appealing.
Conclusion
Mastering the art of how to photograph jewelry can significantly boost your sales and enhance your brand’s online presence. By following the tips and techniques outlined in this article, you can create stunning, professional-quality images that showcase the beauty and details of your jewelry. Remember to pay attention to lighting, background, and composition, and don’t forget the importance of post-processing. With practice and patience, you’ll be able to capture amazing jewelry photos that attract and engage potential customers.