When it comes to jewelry, few things can be more disheartening than discovering that a cherished necklace has broken. Whether it’s a delicate chain that has snapped or a pendant that has come loose, knowing how to fix a broken necklace is essential for jewelry enthusiasts. Not only does it save you the expense of professional repairs, but it also allows you to preserve the sentimental value of the piece. In this guide, we will explore step-by-step methods to help you fix a broken necklace safely and effectively.
Introduction to Necklace Repair
Necklaces add elegance and personality to our daily outfits. But with time, even the sturdiest chains can snap. It’s a common problem, and you don’t always need a professional to fix it. With the right guide and tools, anyone can learn how to fix broken necklace chains at home.
Attempting necklace repair yourself can be cost-effective and satisfying. It requires attention to detail, care, and a bit of patience. Understanding the basics of jewellery repair is the first step. You’ll learn techniques like soldering, wire wrapping, glueing, and clasp replacement.
Whether it’s a delicate gold piece or a chunky fashion item, the methods vary. We’ll explore different repair techniques, suitable for various necklace types. After this, you’ll be set to tackle most common breaks. You can save your cherished jewellery, avoid expenses, and continue to enjoy your favorite necklace for years to come.
Assessing Necklace Damage and Required Tools

Before you can begin repairing your broken necklace, you first need to assess the damage. This is a crucial step that helps you understand the extent of the repair and the tools you require. So, let’s take a closer look at the different types of damage and the essential toolkit you’ll need for a DIY fix.
Here is what you should watch out for:
- Complete Break: This is where the chain has snapped entirely.
- Loosened Link: A link may not be fully broken but could be stretched or opened.
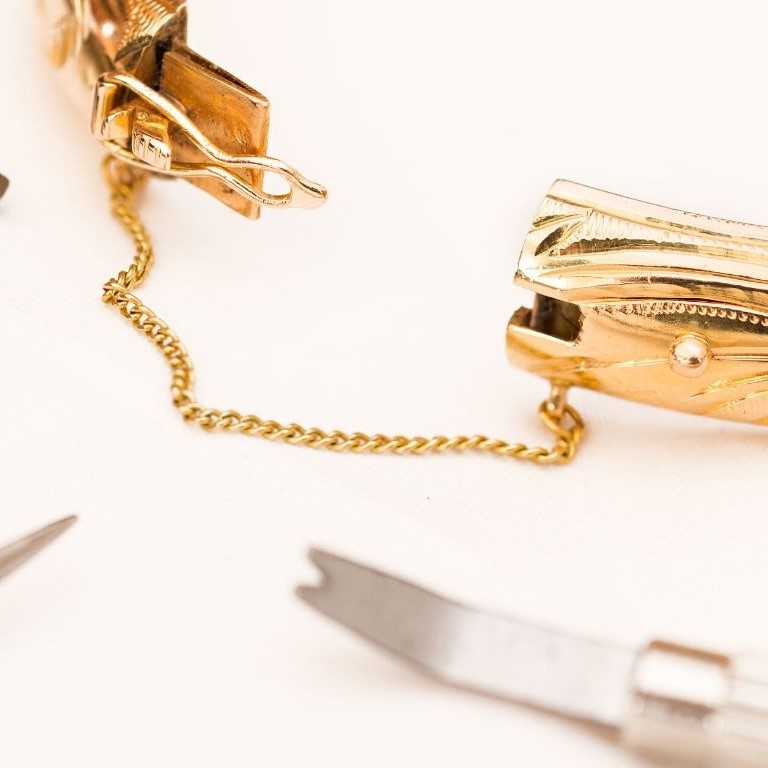
- Damaged Clasp: The clasp might have stopped functioning or become detached.
Necessary Tools for Necklace Repair:
- Pliers: For grip and precision when working with small links or clasps.
- Tweezers: Helpful for handling intricate parts without causing further damage.
- Magnifying Lens: To better see and work with tiny necklace details.
- Soldering Iron: A must-have for fusing metal links back together.
- Wire Cutters: Useful for trimming wires or cutting through damaged parts of the chain.
Remember, if your necklace is a treasured heirloom or made of precious metals like gold, consider seeking professional help to preserve its value. For other less valuable or costume jewellery, DIY repair is a viable and satisfying option.
Step-by-Step Soldering Technique
To fix a broken necklace with soldering, start by gathering your tools. You’ll need a soldering iron, solder, pliers, and a clean workspace. Follow these simple instructions:
- Clean the Broken Ends: Use a small brush to remove any dirt or debris from the broken ends of your necklace chain. It ensures a strong solder joint.
- Prepare the Soldering Iron: Plug in the soldering iron and let it heat up. It’s ready when it can melt the solder easily.
- Add Solder to the Iron: Touch the solder to the hot iron. It will melt. Dab the melted solder onto the iron’s tip.
- Align the Broken Ends: Use pliers to hold the chain’s broken ends together. The ends should touch. This is where the solder will bond the pieces.
- Apply Solder to the Chain: Carefully touch the iron’s tip with melted solder to the broken ends. The heat will transfer the solder to the chain.
- Allow it to Cool: Remove the soldering iron. Let the solder harden. It’ll take only a few moments. Do not touch the hot solder; it burns skin.
- Check the Repair: Once cool, inspect the joint. It should look smooth and even. If not, melt a small additional amount of solder onto the join.
- Clean the Area: Wipe away any residue. Use a soft cloth. It gives the fixed chain a clean finish.
By mastering these basic repair techniques, you will gain confidence in how to fix a broken necklace, making it possible for you to care for your accessories effectively.
Wire Wrapping Method for Chain Repair

Wire wrapping is a useful technique for mending broken necklace chains. This method is ideal for fixing links that have separated. It doesn’t require soldering equipment, making it user-friendly and safe.
To wire wrap a broken chain, you need a few simple tools. Prepare your pliers, wire cutters, and some crafting wire that matches your chain. Select a wire gauge thin enough to pass through the necklace links but sturdy enough to hold.
Here’s how you can repair your necklace with wire wrapping:
- Cut a Piece of Wire: Measure a length of wire around three times the gap you need to bridge.
- Thread the Wire: Weave the wire through the last link of the broken chain end.
- Twist the Wire: Use pliers to twist the wire tightly, securing the link’s ends together.
- Trim Excess Wire: Cut any remaining wire close to the link avoid protruding ends.
- Repeat if Needed: If the break has multiple gaps, use this method for each.
Be gentle to avoid damaging the chain’s structure. Wire wrapped repairs should be sleek and minimal, not bulky. Using this approach, you can extend the life of a necklace and maintain its aesthetic appeal.
Mastering the wire wrapping method can save you from losing your cherished jewelry to simple breaks. However, for thicker chains or more extensive damage, other techniques or professional help might be more suitable.
Using Glue for Minor Repairs
Glue can be a quick fix for small chain repairs. It’s easy, but not always strong. Use glue that’s made for jewelry. Apply it neatly to the broken ends. Press ends together until they set. Let the repaired spot dry fully before wearing. Glue works best on light chains. Avoid using it on valuable or heavy necklaces. For longevity, consider other methods or professional repair.
Clasp Replacement Procedures
Replacing a broken clasp is a straightforward task that often completes a necklace repair. It involves removing the damaged part and attaching a new one. Here’s a simplified guide to help you replace a damaged clasp on your necklace.
Identify the Clasp Type
Clasps come in various designs, including lobster claws, spring rings, and toggles. Check which type your necklace uses.
Gather Your Tools
You will need two pairs of pliers – one for holding the clasp and another for opening and closing the jump rings or loops.
Remove the Broken Clasp
Use the pliers to open the jump ring connecting the clasp to the chain. Carefully detach the broken clasp.
Attach the New Clasp
Thread the jump ring through the loop on the new clasp and the last link of the chain. Use pliers to close the jump ring securely.
Test the Clasp
Make sure the new clasp opens and closes smoothly. Test it out to ensure it’s secure before you wear the necklace.
Replacing a broken clasp can revitalize an old piece of jewelry and is often an easy fix. Regular inspections of your clasp can prevent future failures, maintaining the integrity of your cherished necklace.
Preventative Measures to Avoid Future Necklace Damage

To prevent necklace breakage in the future, consider these practical tips:
- Regular Inspection: Examine your necklace frequently for any signs of wear or weakening links.
- Proper Storage: Always store your necklace in a jewellery box or pouch to protect it from scratches.
- Gentle Handling: Never pull or tug on your necklace; instead, handle it with care to avoid strain.
- Avoid Chemicals: Keep your necklace away from harsh chemicals that can corrode the metal.
- Clasp Check: Ensure the clasp is functioning properly and isn’t loose or damaged.
- Professional Cleaning: Have your necklace cleaned by a professional who can also check for damage.
- Wear with Care: Be mindful of your necklace when wearing it to avoid catching it on objects.
With these preventative measures, you can help prolong the life of your necklace and reduce the need for repairs.
Conclusion: DIY Necklace Repair and When to Seek Professional Help
Mastering DIY repair skills can save your favorite necklaces. Knowing how to fix a broken necklace links empowers you to preserve cherished pieces at home. This guide has shown you to assess damage, use tools, solder, wire-wrap, glue, and replace clasps. With these techniques, you’re set to fix common issues.
But remember, repair has its limits. Fine jewelry and complex breaks may need a jeweler’s touch. Don’t risk damaging valuable items. Seek professionals when needed. They have experience and tools to restore jewelry without causing harm.
Proper care extends your necklace’s life. Store it well, handle with care, and clean it regularly. Check clasps and structure often. These habits prevent damage and the need for repairs.
When it comes to repairing a broken necklace, choose the method that suits the damage. Use professional help for delicate or valuable pieces. Always think safety first. Revive your necklaces and wear them with pride once again.
Frequently Asked Questions About Necklace Repair
Can I fix all types of necklace breaks myself?
Simple breaks can often be fixed at home. For more complex issues, consult a jeweler.
What is the best glue for fixing a broken necklace?
Use a strong jeweler’s glue designed for metal; it’s durable and less noticeable.
How can I tell if I should try to repair my necklace or go to a professional?
If the necklace is expensive or sentimental, it’s safer to get professional help.
What is the cost of professional necklace repair?
Costs vary depending on damage. Simple fixes start around $10-$30, but complex repairs will be more.
Remember, by handling your necklace properly, you can ensure its beauty and durability last. Happy repairing!

