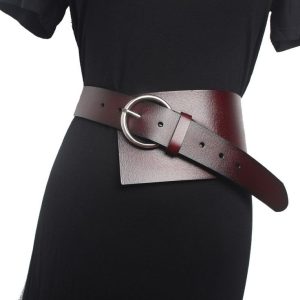
Leather belts are timeless accessories that can elevate any outfit. They come in various styles and colors, but there’s something special about crafting your own. This guide will walk you through the process of making a high-quality belt, step by step.
Gather Your Leathercraft Supplies
Before you begin, collect the necessary tools and materials for your leather belt project. Here’s a list to get you started:
- High-quality leather strap: Choose a full-grain or top-grain leather strap in the desired thickness and width for your belt. Consider a local leather supplier or craft store for good options.
- Cutting tool: A rotary tool with a sharp blade or a sharp craft knife can be used for cutting leather.
- Hole punch: A leather hole punch with various size options allows you to create holes for the buckle and belt holes.
- Hammer: A mallet or small hammer is needed for setting rivets or punching holes.
- Belt buckle: Choose a buckle that complements the style of your belt and has a compatible closure mechanism.
- Rivets or Chicago screws (optional): These are used to attach the buckle to the belt end. Sewing is another option for a more traditional look.
- Ruler and marking pen: A ruler helps ensure straight cuts and even spacing, while a marking pen allows you to trace and mark cut lines and hole placements.
- Sandpaper (optional): Sandpaper can be used to smooth and finish the edges of your belt after cutting.
Safety first! Always wear safety glasses and use sharp tools with caution when cutting leather.
Choosing the Right Leather
The type of leather you choose plays a significant role in the final look and feel of your belt. Here’s a quick guide to popular leather types:
Full-grain leather:
The strongest and most durable type of leather, it develops a beautiful patina over time.
Top-grain leather:
A strong and versatile option with a consistent surface appearance.
Genuine leather:
A general term for various leather grades, it can be less durable than full-grain or top-grain leather.
Thickness also matters. Consider a thickness between 3/32 inch and 1/8 inch for a comfortable and stylish belt.
Cutting Your Leather Strap
Once you have your supplies, it’s time to cut your leather strap to size. Here’s how:
- Measure your waist. Add 3 inches to your waist measurement to determine the total length of the belt strap. This extra length accounts for the buckle and a few holes for adjustability.
- Mark the cutting line. Using a ruler and marking pen, measure and mark the desired length on your leather strap.
- Cut the leather strap. Following the marked line, carefully cut the leather strap with your cutting tool. A sharp rotary tool or craft knife will ensure a clean cut.
Tip: When marking your cut line, you can add a slight taper to the end of the belt where the buckle will be attached. This creates a more polished look.
Adding Belt Holes
With your leather strap cut to size, you’ll need to create holes for the belt buckle and for adjusting the fit. Here’s what to do:
- Mark the buckle hole placement. Decide where you want the buckle to sit on the belt and mark this spot on the wider end of the strap.
- Punch the buckle hole. Using the appropriate size on your leather hole punch, create a hole at the marked location for the buckle attachment.
- Mark the placement of the adjustment holes. Evenly space several marks along the length of the belt strap, leaving room at the tapered end for the buckle to cinch through.
- Punch the adjustment holes. Using the chosen size for your belt buckle prong, punch holes at each marked location.
Tip: There are spacing tools available to help you mark evenly spaced holes for your belt.
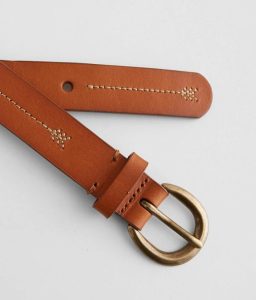
Attaching the Buckle (Optional)
There are two main methods for attaching a buckle to your leather belt: using rivets or Chicago screws, or sewing the buckle on.
Using rivets or Chicago screws:
- Feed the buckle prong through the buckle hole.
- Line up the other half of the buckle with the prong on the opposite side of the belt.
- Insert a rivet or Chicago screw through the designated holes on the buckle.
- Using the hammer and appropriate setter tool (depending on your rivet or Chicago screw type), secure the rivet or screw in place, firmly attaching the buckle to the belt.
Finishing Touches (Optional)
With the buckle attached, you can add some finishing touches to your leather belt:
- Burnishing the edges: Using a leather burnishing tool or sandpaper, smooth and polish the raw edges of the belt for a finished look.
- Applying leather conditioner: Leather conditioner helps protect and nourish the leather, extending its lifespan. Apply a thin coat of conditioner following the manufacturer’s instructions.
These steps are optional, but they can elevate the look and feel of your handmade belt.
Wear Your Creation with Pride!
Congratulations! You’ve crafted your own leather belt. It’s a unique piece that reflects your style and creativity. Enjoy wearing your belt and take pride in the skills you’ve learned throughout this project.
Leatherworking can be a fun and rewarding hobby. With practice, you can create a variety of beautiful and functional leather goods.
Remember, safety is important! When using sharp tools, always have an adult present to assist you.
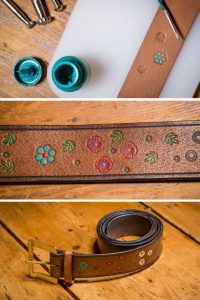
Adding a Personal Touch (Optional)
With the basic structure of your belt complete, you can unleash your creativity and personalize your handmade piece! Here are some ideas to get you started:
- Tooling: Leather tooling involves using specialized tools to imprint designs or patterns onto the leather surface. This can add a unique and decorative touch to your belt. Online tutorials can teach you more about leather tooling techniques, but be sure to consult with an adult about appropriate tools and safety precautions.
- Staining: Leather stain can be used to add color and depth to your belt. Choose a leather stain color that complements the buckle and any outfit you plan to wear with the belt. Always follow the manufacturer’s instructions for applying leather stain and consult with an adult if you have any questions.
- Embellishments: You can add rivets, studs, or other embellishments to your belt for a touch of personality. When choosing embellishments, make sure they are securely attached and won’t cause any snags or tears on your clothing.
These are just a few ideas to get you started. With a little creativity, you can personalize your leather belt to reflect your unique style.