Creating your own bracelets is a fun and rewarding way to express your personal style. But what if you’re worried about the fit? Adjustable bracelets solve that problem, ensuring your creations can be comfortably worn by anyone. This guide explores different techniques for making adjustable bracelets, giving you the freedom to personalize your jewelry!
The Sliding Knot: A Simple and Effective Technique
The sliding knot is a popular method for creating adjustable bracelets. Here’s what you’ll need:
- String or cord: Choose a material that suits your design, like cotton cord, hemp, or embroidery floss.
- Scissors
- Beads (optional)
Here’s how to make a sliding knot bracelet:
- Cut a long piece of string or cord, leaving plenty of extra length for tying the knot.
- Fold the cord in half to create a loop.
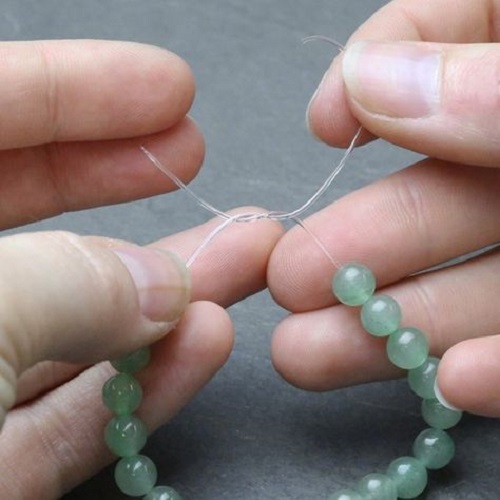
- If using beads, thread them onto one side of the loop before tying the knot.
- Make a simple knot near the end of the folded cord.
- Holding the loop at the top, slide the two loose ends of the cord through the knot.
- Pull gently on both ends to tighten the knot. This will create a sliding loop that adjusts the size of the bracelet.
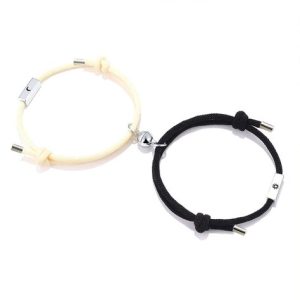
Tip: You can use two different colored cords to create a fun two-toned effect!
Adding a Clasp for Extra Security
While the sliding knot is great, some people prefer a clasp for added security. Here’s how to incorporate a clasp into your sliding knot bracelet:
- Follow steps 1-3 from the sliding knot technique.
- Instead of tying a knot near the end, attach a jump ring to one end of the cord using a crimp bead.
- Attach a clasp (like a lobster claw clasp) to the other end of the cord using another jump ring and crimp bead.
- Thread your beads onto the looped cord.
- Slide the looped cord through the clasp to create the adjustable part of the bracelet.
This method gives you the adjustability of the sliding knot with the security of a clasp.
The Braid and Loop Technique: Classic and Chic
The braid and loop technique is another great way to create an adjustable bracelet. Here’s what you’ll need:
- String or cord in two different colors (optional)
- Scissors
- Beads (optional)
Here’s how to make a braid and loop bracelet:
- Cut two pieces of cord, each long enough to braid comfortably.
- If using beads, thread them onto one of the cords.
- Begin braiding the two cords together. You can use any braid style you like, such as a simple three-strand braid.
- Leave a long tail at the end of the braid.
- Create a loop by folding the other end of the braided cord back on itself. Secure the loop with a knot or by stitching the two ends together.
- Slide the braided section through the loop to adjust the size of the bracelet.
This technique creates a stylish and adjustable bracelet with a braided detail.
Macrame Magic: Adjustable Knotting Techniques
Macrame knots can be used to create beautiful and adjustable bracelets. Here’s a basic introduction:
- Macrame cord
- Scissors
- Beads (optional)
Here’s a simple macrame knot technique for an adjustable bracelet:
- Cut a long piece of macrame cord.
- If using beads, thread them onto the cord.
- Create a square knot near the end of the cord. You can find video tutorials online to learn how to tie a square knot.
- Continue tying square knots down the length of the cord, leaving room at the end for another knot.
- Create a loop by folding the cord back on itself and securing it with a knot.
- Slide the knotted section through the loop to adjust the bracelet size.
Macrame offers endless possibilities for creating unique and adjustable bracelets. With practice, you can learn more complex knotting techniques to create stunning designs.
Beyond the Basics: Experimenting with Adjustable Techniques
Once you’ve mastered the basics, there are many ways to experiment with adjustable bracelets:
- Use different materials like ribbon, yarn, or leather cord.
- Incorporate different bead sizes and shapes.
- Try adding charms or pendants to your designs.
- Combine multiple techniques like braiding and knotting.
The possibilities are endless! So unleash your creativity and have fun making bracelets that are both stylish and adjustable.
Choosing the Right Materials for Adjustable Bracelets
The materials you choose for your adjustable bracelet will depend on the technique you’re using and your desired look. Here are some things to consider:
String or Cord:
This is the most common material for adjustable bracelets. Cotton cord, hemp, and embroidery floss are all popular choices. They come in a variety of colors and thicknesses, so you can find the perfect option for your design.
Braiding Materials:
If you’re using the braid and loop technique, you can use any type of material that braids well. Experiment with different materials like yarn, ribbon, or even embroidery floss.
Macrame Cord:
This thick, twisted cord is specifically designed for macrame knotting. It comes in a variety of colors and is very durable.
Beads:
Beads can add a pop of color, pattern, or texture to your bracelet. You can use beads made from glass, plastic, wood, or even metal. Just make sure the beads are compatible with the size of your cord or string.
Tip: When choosing beads, consider the weight of the bracelet. Heavier beads may require a thicker cord or string for support.

Adding the Finishing Touches: Clasps and Endings
Once you’ve created the adjustable part of your bracelet, you may want to add a clasp or other finishing touch. Here are some ideas:
- Clasps: Clasps provide extra security for your bracelet. Lobster claw clasps are a popular choice because they are easy to use.
- Crimp Beads: These small metal beads are used to secure clasps and jump rings to your cord.
- Knot Endings: For a simple finish, you can tie a knot at the end of your cord and trim the excess.
- Decorative Endings: You can add a decorative touch by using beads, tassels, or other embellishments at the ends of your bracelet.
The finishing touch you choose is a matter of personal preference. Consider the overall style of your bracelet and what would look best.
Gifting with Flair: Adjustable Bracelets for Everyone
Homemade bracelets make wonderful gifts! With adjustable features, you can ensure your creation fits the recipient perfectly. Here are some tips for gifting your adjustable bracelets:
- Presentation Matters: Wrap your bracelet in a decorative box or pouch to make it look extra special.
- Consider the Occasion: Is it a birthday, holiday, or just because? Tailor your design to suit the occasion.
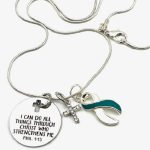
- Personalize It: Add a charm with the recipient’s initials or birthstone for a personal touch.
Adjustable bracelets are thoughtful and unique gifts that anyone can appreciate.