Clay bracelets are a fun and easy way to accessorize with a personal touch. They’re perfect for all ages and can be customized to fit any style. This article will guide you through everything you need to know to make your own clay bracelets, from choosing the right clay to adding creative designs. So grab your supplies and get ready to craft!
Let’s Get Started: Making clay bracelets is a great way to unleash your creativity and express yourself through fashion. They’re also a budget-friendly and thoughtful handmade gift!
Choosing the Right Clay
There are several types of clay suitable for making bracelets. Here’s a breakdown of some popular options:
Polymer Clay:
Polymer clay is a versatile and popular choice for jewelry making. It comes in a wide variety of colors and can be baked at home to harden.
Air-Dry Clay:
Air-dry clay is another easy-to-use option. It hardens on its own at room temperature, eliminating the need for an oven.
Sculpey Clay:
Sculpey clay is a type of polymer clay that can be baked or air-dried. It’s a good option if you’re unsure which method you prefer.
Essential Supplies for Clay Bracelets
Here’s a list of everything you’ll need to create your own clay bracelets:
- Clay of your choice (polymer clay, air-dry clay, or Sculpey clay)
- Rolling pin
- Craft knife or blade
- Parchment paper (for baking polymer clay)
- Sandpaper (for smoothing clay)
- Beads (optional)
- Jewelry clasps (optional)
- Straw or toothpick (for creating holes)
- Ribbon or string (for tying bracelets if not using clasps)
Step-by-Step Guide to Making Clay Bracelets
Now that you have your supplies gathered, let’s get crafting! Here’s a step-by-step guide to making clay bracelets:
-
Condition the Clay: Most clay benefits from being conditioned to soften it and make it easier to work with. Follow the manufacturer’s instructions for conditioning your specific type of clay.
-
Roll Out the Clay: Use your rolling pin to roll out the clay on a smooth surface like a table or countertop. Aim for an even thickness throughout.
-
Cut Out Shapes: Use a craft knife or blade to cut out desired shapes from the rolled-out clay. Classic long rectangles for wrapping around the wrist or fun shapes like hearts or stars are great options!
-
Create Holes (Optional): If you’re using beads or want to string the bracelet with ribbon, use a straw or toothpick to poke holes in the clay shapes before baking or drying.
-
Bake or Air-Dry (Polymer Clay Only): If using polymer clay, follow the baking instructions on the package to harden the clay shapes. Air-dry clay will harden on its own at room temperature, eliminating the need for baking.
-
Sanding (Optional): Once the clay shapes are hardened, you can use sandpaper to smooth any rough edges.
-
Assemble Your Bracelet: Here’s where you can get creative! String your clay shapes, beads (if using), and jewelry clasps (if using) onto ribbon or string. Double knot the ends of the ribbon or string to secure the bracelet.
Spruce Up Your Clay Bracelets: Design Ideas
The beauty of DIY clay bracelets is the endless customization possibilities! Here are some ideas to inspire your designs:
-
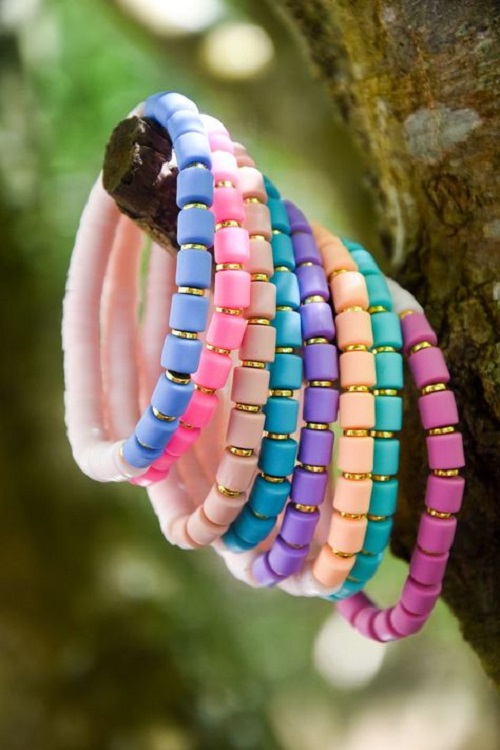
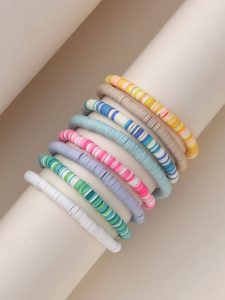
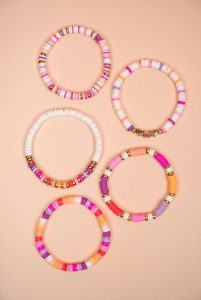
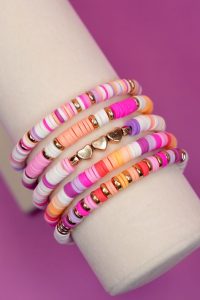
Mix and Match Colors: Combine different colored clays to create unique patterns or stripes.
-
Add Beads: Incorporate colorful or patterned beads for an extra pop.
-
Imprint Designs: Use objects like buttons or stamps to create textured designs on the clay before baking or drying.
-
Metallic Touches: Brush on metallic craft paint for a touch of glam.
-
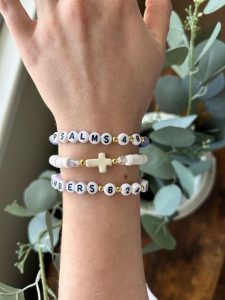
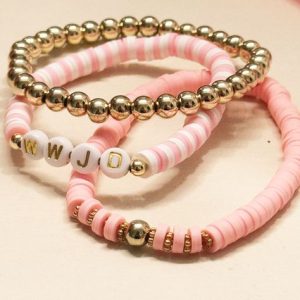
Lettering: Write messages or initials on the clay shapes using craft paint or carving tools.
Clay Bracelets: The Perfect DIY Project
Making clay bracelets is a fun and rewarding DIY project. It’s a great way to spend time with friends or create unique and personalized gifts. With a little creativity, you can craft beautiful and stylish bracelets that reflect your personality!
We explored the basics of making clay bracelets and even dabbled in some design ideas! Now, let’s look at some additional tips and tricks to elevate your creations.
-
Experiment with Textures: Texture adds visual interest to your bracelets. Here are some ways to experiment:
- Roll the clay over fabric to imprint a cool pattern.
- Gently press leaves or other objects into the clay before baking/drying.
- Use sandpaper to create a matte finish or carving tools for geometric designs.
-
Curing Techniques:
- Polymer Clay: Follow the baking instructions on the package to harden the clay shapes. Be sure to bake in a well-ventilated area with adult supervision.
- Air-Dry Clay: Air-dry clay hardens on its own at room temperature. Check the package for specific drying times, which can vary depending on the thickness of your clay creations.
-
Bracelet Closures: There are a few ways to secure your clay bracelets:
- Ribbon or String: Thread the clay shapes and any beads onto ribbon or string. Double knot the ends for a secure closure. This is a simple option but might not be as durable.
- Jewelry Clasps: Incorporate jewelry clasps into your design for a more polished look. Look for clasps sized appropriately for your bracelet width. Many craft stores sell small crimp clasps that work well.
-
Safety Tips:
- Always wash your hands before and after handling clay.
- Be mindful of small parts, especially beads, if creating bracelets for younger children.
- When using polymer clay, be sure to bake in a well-ventilated area with adult supervision. Follow the baking instructions on the package carefully.
Clay Bracelets: Beyond the Basics
Clay bracelets are a great foundation for other creative jewelry projects. Here are some ideas to spark your imagination:
-
Clay Bead Bonanza: Make small clay beads using leftover clay. Once baked/dried, string them onto thread or elastic cord to create unique necklaces or earrings.
-
Clay Pendants: Create fun and personalized pendants for necklaces by shaping clay into desired shapes and following the curing techniques.
-
Clay Phone Charms: Make small clay charms or shapes that reflect your interests and attach them to your phone case using a jump ring for a personalized touch.
The Joy of Making Clay Bracelets
Making clay bracelets is a fun and rewarding creative outlet. It’s a perfect activity for individuals or a group crafting session with friends. With a little planning and these helpful tips, you can create beautiful and personalized clay bracelets that showcase your unique style!