A belt is a versatile accessory that complements any outfit. However, sometimes, it might be a tad too long, causing inconvenience and discomfort. Fortunately, shortening a belt isn’t rocket science. With the right tools and a bit of guidance, you can customize your belt to the perfect fit in no time. How to shorten a belt?
Before You Begin: Gather Your Tools
Before embarking on your belt-shortening journey, gather the necessary tools to make the process smooth and efficient.
- Screwdriver: Most belts have a screw holding the buckle in place. You’ll need a screwdriver that matches the screw head.
- Measuring tape or ruler: To determine the desired length of your belt.
- Sharp scissors or a utility knife: For cutting the belt to the desired length.
- Leather punch or drill: To create new holes if needed.
- Marker or pen: To mark the cutting point on the belt.
- Edge finishing tool (optional): To give a polished look to the cut edge of the belt.
Shortening from the Buckle End
How to shorten a belt? This method is ideal if you want to preserve the original tail end of your belt with the pre-existing holes.
Unscrew the Buckle
- Carefully unscrew the screw that attaches the buckle to the belt.
- Gently remove the buckle.
Measure and Mark
- Wrap the belt around your waist, ensuring it’s comfortable and at your desired tightness.
- Mark the point where the belt meets the buckle with a marker or pen.
- Add an extra half-inch or so to this measurement to account for overlap when reattaching the buckle.
Cut and Reattach
- Using your scissors or utility knife, carefully cut the belt at the marked point.
- Reattach the buckle to the shortened belt, ensuring it’s aligned correctly.
- Secure the buckle by screwing it back in place.
Shortening from the Tail End
If you don’t mind losing the original tail end of your belt, this method offers a quicker alternative.
Step 1: Measure and Mark
- Again, wrap the belt around your waist to determine the ideal length.
- Mark the desired length on the tail end of the belt, leaving enough space for the buckle tongue to pass through.
Step 2: Cut and Punch
- Cut the belt at the marked point.
- If necessary, use a leather punch or drill to create new holes in the shortened tail end.
- Ensure the new holes are evenly spaced and align with the existing ones.
Additional Tips and Considerations
- Leather Belts: If you’re shortening a leather belt, consider using an edge finishing tool to burnish the cut edge, giving it a polished and professional look.
- Fabric Belts: Fabric belts may fray after being cut. To prevent fraying, you can apply a small amount of clear nail polish or fabric glue to the cut edge.
- Double-Check Measurements: It’s always better to err on the side of caution and cut a bit less than you think you need. You can always trim more later, but you can’t add length back on!
- Practice on an Old Belt: If you’re unsure about your cutting or punching skills, practice on an old or inexpensive belt first.
Shortening a belt is a simple yet effective way to ensure a comfortable and stylish fit. By following these step-by-step instructions and using the right tools, you can customize your belt to your exact specifications in no time. Remember, patience and precision are key. Take your time, double-check your measurements, and don’t be afraid to practice on an old belt before tackling your favorite one.
Troubleshooting: Dealing with Different Belt Types
While the general principles of belt shortening remain the same, certain belt types may require specific techniques or considerations. Let’s tackle some common scenarios you might encounter.
Ratchet Belts
Ratchet belts, known for their micro-adjustable mechanisms, present a unique challenge. Instead of traditional holes, they feature a track system on the underside. To shorten a ratchet belt:
- Locate the Release Mechanism: Find the small lever or button that releases the belt from the buckle.
- Detach the Buckle: Carefully slide the buckle off the belt.
- Measure and Cut: Measure and mark the desired length on the belt, ensuring you leave enough space for the buckle to reattach securely.
- Cut and Reattach: Cut the belt at the marked point. Reattach the buckle, ensuring it clicks into place properly.
- Test the Fit: Try on the belt to ensure it fits comfortably and the ratchet mechanism functions smoothly.
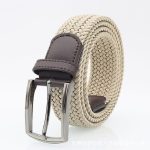
Braided Belts
Braided belts are often made from leather or fabric strips woven together. Shortening them requires a slightly different approach to avoid unraveling.
- Secure the Braid: Before cutting, wrap a piece of masking tape or thread tightly around the belt where you intend to make the cut. This helps prevent the braid from unraveling.
- Cut Carefully: Use sharp scissors or a utility knife to cut through the braid, ensuring a clean and even cut.
- Seal the Edges: Apply a small amount of clear nail polish or fabric glue to the cut edges to prevent fraying and maintain the integrity of the braid.
- Reattach the Buckle: Reattach the buckle to the shortened belt, ensuring it’s aligned correctly.
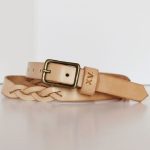
Belts with Decorative Buckles or Embellishments
If your belt has a decorative buckle or embellishments near the tail end, shortening from the buckle end is the preferred method to preserve these features. However, if shortening from the tail end is necessary:
- Carefully Remove Embellishments: If possible, gently remove any decorative elements before cutting the belt. This allows for easier reattachment later.
- Mark and Cut Precisely: Mark the desired length carefully, ensuring you avoid cutting through any embellishments. Use precision tools for a clean cut.
- Reattach Embellishments: Once the belt is shortened, reattach any decorative elements using strong adhesive or stitching, if applicable.
Caring for Your Shortened Belt
After shortening your belt, proper care ensures its longevity and continued functionality.
- Regular Cleaning: Clean your belt regularly with a damp cloth and mild soap, depending on the material.
- Conditioning (Leather Belts): Leather belts benefit from occasional conditioning to keep them supple and prevent cracking.
- Storage: Store your belts in a cool, dry place, away from direct sunlight and moisture.
- Avoid Over-Tightening: Avoid over-tightening your belt, as this can put stress on the material and stitching, potentially leading to premature wear and tear.
Belt Shortening for Special Occasions
Shortening a belt can also be a helpful solution for special occasions or events.
- Weddings and Formal Events: If you’re wearing a dress or outfit that requires a specific belt placement, shortening a belt can ensure a perfect fit and avoid any awkward bunching or overhang.
- Costume Adjustments: When putting together a costume for Halloween or a themed party, shortening a belt can help achieve the desired look and ensure comfort throughout the event.
- Maternity Wear: During pregnancy, a woman’s body undergoes significant changes. Shortening belts can provide a comfortable and adjustable fit as her waistline expands.
Conclusion
How to shorten a belt? Shortening a belt is a practical skill that allows you to tailor your accessories for optimal comfort and style. With a few basic tools and a bit of know-how, you can transform an ill-fitting belt into a perfect fit. Remember, precision and patience are key. Take your time, follow the appropriate techniques for your belt type, and enjoy the satisfaction of a perfectly customized accessory.
Now, go forth and conquer those too-long belts!